Quantcast
Channel: Saurav Dhyani - #MSDynNAV & #MSDyn365bc
Viewing all 1143 articles
Browse latest View live

How to Use an Embedded Picture in a RTC Report.

$
0
0
Hi all,

Let's see how to Display an Embedded Picture in a Report.

* The Steps Shown below are from NAV Version 2013 R2.

It was a query from one of my friend +shubhangi verma  about how to add Embedded Picture in Report.

I am using Standard report 405 Which can be downloaded from the link provided at the end of the Post.

There are certain steps that we need to follow while adding an Embedded Picture in a Report. Let's see them.


Prepare Your Picture that you want to use in the Report. I will be using the Blog Home Page as Shown Below.


1. Open the Report in Developer Environment and Open the Report Layout in Visual Studio.

2. Make some space for the image to be placed.

3. If you cannot see Report Data Pane, open same from View Menu as shown Below.
(Last Option in View)


4. In the Report Data Pane Right Click Image and select Add Image.

5. Select the Image file and you can see it in under Image Item as shown below.


6. Drag and Drop the Image in the Report, it will show you options as shown below.


7. Provide it a Name and set the Size Options too and click ok.

8. You will see the Image Added in the Report Layout.

9. Change the Width and Position as per your requirement.


10. Save the Layout and Run the report and output will be something like as shown below.


Hope post help My Friend and Others too.

The Modified Objects can be found in my SkyDrive.
File Name - Add_Embedded_Image_Report_V2013R2_Report_405.rar

Regards,
Saurav Dhyani
saurav-nav.blogspot.com

NAV 2013 & NAV 2013 R2 - Comman Issue Related to Dimension in Step 2.

$
0
0
Hi all,

This is one of the most Comman error that most of us are facing while upgrading to NAV 2013 or NAV 2013 R2 From NAV 2009 / 2009 SP1 / 2009 R2.

What we had Completed?

A. We completed Step 1 Successfully.
B. Converted the Database to NAV 2013.
C. Converted the Database to NAV 2013 R2.
D. Imported the Merged Objects & Toolkit Step 2 Objects.

What we are Currently Doing?

A. Run the Upgrade Step 2.
B. Tested the Connection.
C. Clicked on Transfer Data.

What is the Error Message While Transferring Dimension?

Dimension Value ID must have a value in Dimension Set Entry: Dimension Set ID=0, Dimension Code=<Dimenion Code>. It cannot be zero or empty.


Why the Error Message?

After Trying to Find the Reason, i figured out that the error is due to a dimension Value that have been applied on a posted or UN-posted document, but due to certain Required Customization our Code had deleted the Dimension Value from Dimension Value Table.

Below is the Example to understand the issue -

1. I have a Posted Sales Invoice Which have Dimension Code is AREA and Dimension Value for AREA IS 30.


2. Our Code have deleted the Value 30 For Dimension AREA as Shown Below. (User cannot delete from here as there is a check which check usage of Dimension Value in Documents)


* As per Microsoft Standard we should not delete any dimension Value instead if don't want to use the same we can set the Blocked as True.

So Now we know what is the issue, in the Next post we will see how we resolve issue if -

A) We are about to begin the Upgrade.

B) We are in step 2 of Upgrade and Facing this issue.

Stay Tuned.

"These postings are provided "AS IS" with no warranties and confer no rights. You assume all risk for your use."

Regards,
Saurav Dhyani

NAV 2013 & NAV 2013 R2 - Comman Issue Related to Dimension in Step 2 Continued.....

$
0
0
Hi all,

As discussed and Found the Cause of Issue related to Dimension During Upgrade, Lets' see how to Resolve Same Before Upgrading or During Step 2.

If you haven't Read the Earlier Post Use The Link.

NAV 2013 & NAV 2013 R2 - Comman Issue Related to Dimension in Step 2 

There are two points which make our life Easy -

1. In Earlier Version i.e 2009 / 2009 SP1 / 2009 R2, the Dimension Values were used to Store in a seprate Table.

2. The Upgrade Step Batch Job Commits the Transaction Before the Error Occurs, i.e If Table X have Issue in Data Everything done before Table X is Committed.


Why these two things help us?

POINT 1. If we are planning to Upgrade and want to be on Safe Side i can just do a check on all Tables related to Dimension in my Current Version i.e 2009.

-- Just Filter Tables as @*Dimension* and you get all the tables related to Dimension which need to be checked.


-- If you check the Above List of Tables we only need to do the Check for 12-14 Tables which are listed later in the Post.

-- Run the Batch and if required create the Necessary Entries and Start the Upgrade Process.

POINT 2.If you get Stuck during Upgrade Step 2 You can do same steps in NAV 2013 R2.

-- Before the Error Comes the Dimension & Dimension Values have been transferred to actual tables.

-- Run the Batch and create the Necessary Entries.

How to Check Wrong / Missing Dimension Value During Step 2 of Data Migration ?

1. If you a error related to a dimension, Just start the debugger and Re-run the Upgrade Step 2.


2. The Debugger will stop you somewhere in Table 480 where its checking Dimension Set ID.


3. Navigate some steps Back in Debugger as shown below, you can find the Table where the Problem IS.


As shown above i can see that there is an issue in Ledger Entry Dimension.

How to Resolve the Issue ?

Now we know the reason of error, and the table on which this error is coming, Lets Resolve the issue.

-- We just need to identify the Missing Dimension and we need to create it into Dimension Value Table with BLOCKED SET TO TRUE.

-- It may be the case that the error is coming due to Multiple Missing Dimension Value.

BELOW is a SQL Query which will help you to identify the Missing Dimension Value. As i am not good with SQL Queries you need to run it one by one for all the tables and take corrective actions.

--------  QUERY ------------------

-- Replace all <<>> parameters with actual values.
-- Parmeters Required.
-- <<Database Name>> - NAME OF DATABASE.
-- <<SQL Company Name>>$<<Issue Table SQL Name>>  - Complete Table Name, IN SQL Complete Table Name Contain Company Name Too.
--
USE
[<<Database Name>>]

Select Distinct UsedDIM.[Dimension Code], UsedDIM.[Dimension Value Code] from [<<SQL Company Name>>$<<Issue Table SQL Name>>] as UsedDIM
Left Join [<<SQL Company Name>>$Dimension Value] as DimVal ON
UsedDIM.[Dimension Code] = DimVal.[Dimension Code] AND UsedDIM.[Dimension Value Code] = DimVal.Code
Where DimVal.[Dimension Code] IS NULL

------------------------------------

The Above query will give you the Dimension Code and Dimension Value which is present in any transaction but the Value does not exist in Dimension Value Table.

Just create the Dimension Values in the Dimension Value with BLOCKED SET TO TRUE and we are good to go.

** The above step need to run on every company.

** Just Replace the Parameters and Run the Query, The Query Result will show the Missing Dimension Value.

** The above Step will be executed for Following Tables.
Default Dimension
Ledger Entry Dimension
Journal Line Dimension
Document Dimension
Production Document Dimension
Posted Document Dimension
G_L Budget Dimension
Service Contract Dimension
Job Task Dimension
Document Dimension Archive
FA Allocation Dimension
Item Budget Dimension

Let's try to execute the Query on Ledger Entry Table as we deleted one record in previous Post.


So now we know that dimension Value 30 for dimension Area does not exist in Dimension Value, so let's create it.


So Let's again run the Query and see Output.


So after repeating the steps for all tables in all the companies we are good to go ahead.

The SQL Query if required can be downloaded from my Skydrive.

File Name -  Get_Used_Deleted_Dimension_Values.rar

Hope you find the information useful.

Regards,
Saurav Dhyani
http://saurav-nav.blogspot.com

NAV 2013 - cumulative update 14 Released.

$
0
0
Hi all,

Please find below the details of Cumulative Update 14 released for Microsoft Dynamics NAV 2013.

Title - Update Rollup 14 for Microsoft Dynamics NAV 2013
Build No. - 36605
Release Date - May, 2014
Local Version Included - AU, AT, BE, CH, DE, DK, ES, FI, FR, IS, IT, NA, NL, NO, NZ, SE, UK

Download Link


For information about previous Update Rollup released for Microsoft Dynamics NAV 2013 below are the links -

Update Rollup 1 to 6                             Update Rollup 7                                        Update Rollup 8 

Update Rollup 9                                    Update Rollup 10                                      Update Rollup 11

Update Rollup 12                                  Cumulative Update 13 

These links required valid Partner Source / Customer Source Login...

Regards,
Saurav Dhyani
saurav-nav.blogspot.com

Microsoft Dynamics NAV Localization Portal.

$
0
0
Hi all,

I found a great page on Partner source which i always wanted to have.

I thought you might also be interested to know about the page.

Microsoft Dynamics Localization Portal - Microsoft Dynamics NAV is what i am taking about.

So lets see what is it -

What Microsoft Says about the Page -

"This Dynamics Localization portal provides partners information by country about localization features including info on regulatory features, documentation, plus associated ISV solutions. "


What Can we do here ?

-- View Report the currently planned to be released localization features list for any designated country by version.

-- View Report and access links related to released country-specific localized features for any designated country by version. This includes:

Features released as part of Microsoft Dynamics NAV 2013
Plus features released subsequent to the main version release above

-- View Report and access links for documentation related to specific countries or specific localization features.

-- View Report information on country related ISV solutions.

Which all countries are included as of today?

1.  Australia
2.  Canada
3.  Denmark 
4.  France
5.  Germany
6.  India
7.  Italy
8.  Mexico
9.  Netherlands
10. New Zealand
11. Spain
12. Sweden
13. United Kingdom
14. United States

What is the Update Frequency?
As per Microsoft -

"The country reports contained within the portal landing page are refresh every week to ensure information is kept up to date."

Glims of Report Format -


Hope you enjoy the New Page Which can give you information about your localization features released.

Stay Tuned for More...

Regards,
Saurav Dhyani
saurav-nav.blogspot.com

NAV 2013 R2 - Cumulative update 7 Released.

$
0
0
Hi all,

Please find below the details of Update Rollup Cumulative Update 7 released for Microsoft Dynamics NAV 2013 R2.

Title - Cumulative Update 7 for Microsoft Dynamics NAV 2013 R2
Build No. - 36703
Release Date - May, 2014
Local Version Included - AU, AT, BE, CH, DE, DK, ES, FI, FR, IS, IT, NA, NL, NO, NZ, SE, UK

Download Link

Note: Implementing this cumulative update will require a database conversion unless you have already implemented update rollup 5.


For information about previous Update Rollup released for Microsoft Dynamics NAV 2013 R2 below are the links -

   Update Rollup 1                             Update Rollup 2                                 Update Rollup 3                   

   Update Rollup 4                             Update Rollup 5        Update Rollup 6

Regards,
Saurav Dhyani
saurav-nav.blogspot.com

NAV Classic & RTC - How to Add Users in Database.

$
0
0
Hi all,

I know most of us know this but its a post for the New Consultants.

This post is based on requirement of one of my friend +Shrikant Sharma

In this post we will see How to Add Users  in the Database, so if you know how to do you can skip the post.


Let's start.

Till NAV 2009 R2 Navision used to support both types of Login -

a) Database Login. (SQL Login)

b) Windows Login. (Active Directory Account)

Till NAV 2009 R2 the option to add user was available in Classic Client. Below are the screens about how to add users.

For adding users in database - 

1. Open database in classic client.

2. Open Tools and from Security Select Type of Login you want to add - Database or Windows Login.


3. If you are trying to add a database login, make sure its already added in SQL Server. Add the user Name in the Database Login as shown below.


4.  If you are trying to add a Windows (Active Directory) Login, provide the complete User Name with Domain in the window Login as shown below.


5. After Completing Step 3 OR/AND 4 Provide a Role to user as shown below.


6. After adding Role Synchronize the users as shown below.


In Navision 2013 Database Login are no more supported. So we can add the windows (Active Directory) Account only. 

Please find below the steps of adding Users in NAV 2013 R2 Database, steps remain same for NAV 2013 also.

1. Open Windows (Role Tailored) Client.

2. Navigate to Departments --> Administration --> IT Administration --> General and open Users from the List as shown below.


3. In the List Page Select New from Left Hand Menu.


4. In Windows Authentication Tab, Enter the Complete User name with Domain Name as shown below.


5. Click Tab and all other details will automatically be filled in, otherwise select the domain and user from the drill down list.

6. From User permission set, select the permission that you want to assign to the user and click OK.


Now you are good to go.

I hope it will help some of the consultants who still don't know how to add users in the database.

Regards,
Saurav Dhyani
saurav-nav.blogspot.com

NAV 2013 & NAV 2013 R2 - You do not have access to Microsoft Dynamics NAV - Create User From SQL.

$
0
0
Hi all,

This post is based on suggestion from +Ami Paneri Upadhyay

* The Screen Shots and Query Applies - TO NAV 2013 R2. Steps Remain Same for NAV 2013 but query will get change.

* The Query for NAV 2013 can be found in my Skydrive, Link at the end of the post.

Let's see what was required and how we can achieve it.

CASE -

I received a database from customer and my windows login is not there in the database. I don't want to delete Customer Users from the database but want to add myself in the Users. How can we do this?

OR

We have a database internally for development. All the consultants having User ID's in the database are not available. I want to access the database, How can i achieve it?


What is the Error message?

Where i try to open the database i get below error from Role Tailored Client -

You do not have access to Microsoft Dynamics NAV. Verify that you have been set up as a valid user in Microsoft Dynamics NAV.


What we Want?

A) Add My Windows Login Details in User Table & User Property Table.
B) Add Role to My User in Access Control Table.

What are the Fields that are required to be filled in?

A) USER TABLE -

Below are the fields in USER TABLE.


The Problem that i see in this field list is of Field "Windows Security ID".

B) USER Property TABLE-

Below are the fields from USER Property Table.


All fields Look Good in this Table.

C)  Access Control Table -

Below are the fields from Access Control Table.


All fields Look Good in this Table.

So let's see How can i get "Windows Security ID" for my ID so that i can add same in User Table.

STEP 1 - HOW TO GET Windows Security ID or SSID

You can find so many ways to find it, but i find the Powershell as easy tool to find it.

1. Open Powershell.

2. Copy Below command in Command Window.
-----------------------------------------------------------
# Author - Saurav Dhyani
# BLOG - saurav-nav.blogspot.com
# Replace YourDomain\Your ID with your Domain Name & User Name

$objUser = New-Object System.Security.Principal.NTAccount("YourDomain\Your ID")

$strSID = $objUser.Translate([System.Security.Principal.SecurityIdentifier])
$strSID.Value
------------------------------------------------------------

Replace YourDomain\Your ID with Your Domain and USER ID.

Run the Command and in the Output Window you can see your SSID, as shown below.


Copy and Save the SSID, we will require it further.

STEP 2 - ENTER USER Details in NAVISION Database with Roles.

1. Open SQL Server Management Studio.

2. In My Case the database that i want to get access is Demo Database NAV (7-1).

3. Click on New Query and paste below listed command in the query window.

------------------------------------------------------------------------
-- Author - Saurav Dhyani
-- BLOG - saurav-nav.blogspot.com
-- APPLIES TO - NAV 2013 R2
-- Replace
--DATABASE NAME - with your database name
--YourDomain\Your ID - with your Domain Name & User Name
--Your SSID - with SSID as copied in STEP 1

USE [DATABASE NAME]

DECLARE @USERSID uniqueidentifier, @WINDOWSSID nvarchar(119), @USERNAME nvarchar(50), @USERSIDTXT varchar(50)

SELECT NEWID()
SET @USERNAME   = 'YourDomain\Your ID'
SET @USERSID    = NEWID()
SET @USERSIDTXT = CONVERT(VARCHAR(50), @USERSID)
SET @WINDOWSSID = 'Your SSID'

INSERT INTO [dbo].[User]
          ([User Security ID],[User Name],[Full Name],[State],[Expiry Date],[Windows Security ID],[Change Password],[License Type]
          ,[Authentication Email])
    VALUES
          (@USERSID,@USERNAME,'',0,'1753-01-01 00:00:00.000',@WINDOWSSID,0,0,'')

INSERT INTO [dbo].[User Property]
          ([User Security ID],[Password],[Name Identifier],[Authentication Key],[WebServices Key],[WebServices Key Expiry Date],
          [Authentication Object ID])
    VALUES
          (@USERSID,'','','','','1753-01-01 00:00:00.000','')

INSERT INTO [dbo].[Access Control]
          ([User Security ID],[Role ID],[Company Name])
    VALUES
          (@USERSID,'SUPER','')
GO
------------------------------------------------------------------------
Replace

DATABASE NAME - with your database name
YourDomain\Your ID - with your Domain Name & User Name
Your SSID - with SSID as copied in STEP 1

Execute the Query and result we be something like as shown below.


Now if i try to Run the windows client i will be able to access same.

* The Query provide SUPER Role to user, if required you can change the Role in the Last part of the query.

THE Power shell command & SQL Queries can be downloaded from my SKYDRIVE.

File Names in Sky Drive - NAV 2013 & NAV 2013 R2 Add User to Database.rar

The Zip Folder Contain Below Listed Files -

-- Power Shell Command  - (Applies to NAV 2013 & NAV 2013 R2)
-- SQL Query - (Applies to NAV 2013)
-- SQL Query - (Applies to NAV 2013 R2)

Your Commands and feedback are much appreciated.

Thanks & Regards,
Saurav Dhyani
saurav-nav.blogspot.com

NAV 2013 R2 - HowTo Backup a Multi Tenant Environment?

$
0
0
Hi all,

We had seen how to create a Multi Tenant Environment with NAV 2013 R2 earlier.

But what if i want to do a backup of the Multi Tenant Environment and Restore it on a Different Server. How can i achieve it as in my SQL now i have multiple databases.

So let's see how we can achieve it.

** References - Waldo Blog. Thanks to Waldo for sharing the Information, i have tried to append the steps listed in the Video.

Scenario -
I have a Multi tenant Environment Created with Multiple Tenants (5) and Application Objects. I want to Backup the whole Environment and Restore it on New Server.


Steps - (Before Starting the process, lets see the environment creation steps)

1. Created a Service MultiTenantBackup as shown Below.


2. Restored a Cronus W1 Databases, Copied the Company for 4 Times as shown below. Renamed Companies to Tenant 1 to Tenant 5.


3. Created the MultiTenant Environment using the Powershell Command, as shown below.
* You can refer the Blog articles listed here if you want to see how to create a multiTenant Environment.


As you can see that i have 5 Tenants databases in SQL and a Application Database.

4. For Backup all the Tenant and Application database at a Specified Location, i have used Below Powershell Command.
* Powershell should be Run as Administrator. How to Open Powershell?
--------------------------------------------------------------------------------------
# Powershell Command to Take Backup of Tenant and Application Database.
# Author - Waldo
# Modified By - Saurav Dhyani
# Blog - saurav-nav.blogspot.com
# Parameters Need to Specify Before Running Command - 
# ServiceInstance - Name of Service Instance You want to Backup.
# BackupLocation - Path Where you want Backup to be Stored.

$ServiceInstance = 'MultiTenantBackup'
$BackupLocation = 'C:\D DRIVE\Multitenancy\Backup\Tenants\'

#Backup the Application Database
$NavApplication = Get-NAVApplication $ServiceInstance
$AppDatbaseName = $NavApplication.'Database Name'
$AppDataBackupFileName = $BackupLocation + $NavApplication.'Database Name' + '.bak'
Get-Variable AppDataBackupFileName
Backup-SqlDatabase -ServerInstance $NavApplication.'Database Server' -Database $NavApplication.'Database Name' -BackupFile $AppDataBackupFileName -BackupAction Database

#Backup All the Tenant Databases
$NavTenants = Get-NAVTenant $ServiceInstance
Foreach ($NavTenant in $NavTenants)
{
 $TenantBackupFileName = $BackupLocation + $NavTenant.Databasename + '.bak'
 Get-Variable TenantBackupFileName
 Backup-SqlDatabase -ServerInstance $NavTenant.DatabaseServer -Database $NavTenant.Databasename -BackupFile $TenantBackupFileName -BackupAction Database
}
----------------------------------------------------------------------------------------

You can download the Powershell command from the SkyDrive Link. Link is available at end of the Post.

5. Let's Understand the Command.

At the Beginning of the Command we set two Parameters i.e -
 1. Service Instance = The name of Service Tier we want to Backup.
 2. Backup Location = The Path Where we want our Databases Backup Should be Placed.

Then Using Powershell we get the application database Name attached to the Service Instance, Provided the File Name and by using SQLPS Backup Command we Placed the Backup at the Specified Location.

* For other Parameters During Backup you can look at Backup-SQLDatabase Command Parameters in Powershell Command Addin Window.

After Backup of the Application Database, we look for Tenants Mounted in the Service Instance and then for each Tenant in the Instance we Run the SQLPS Backup Database Commandlet to backup the tenant Databases.
Here is what happens when i execute the commandlet.


Let's Naviage to Folder and see the Backup done by the Powershell script.


You can download the Powershell command from my SkyDrive.

File Name - Command 7 - NAV 2013 R2 - Backup a Multi Tenant Environment

In Next post we will try to restore the backup in a new environment.

Hope you find the information useful.

Regards,
Saurav Dhyani
saurav-nav.blogspot.com

NAV 2013 R2 - Restore a Multi Tenant Environment.

$
0
0
Hi all,

We had seen how to create a Multi Tenant Environment& 
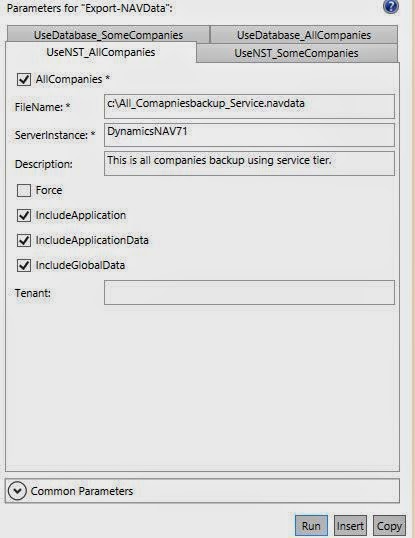
How to Backup the Complete Environment with NAV 2013 R2 in the respective articles.

But what if i want to do a restore backup of the Multi Tenant Environment in a Different Server. How can i achieve it as in my SQL now i have multiple databases.

So let's see how we can achieve it.

** References - Waldo Blog. Thanks to Waldo for sharing the Information, i have tried to append the steps listed in the Video.

Scenario -
I took backup of My Multi tenant Environment Created with Multiple Tenants (5) and Application Objects. I want to Restore the whole Environment and Restore it on New Server.


Steps - (Before Starting the process, lets see the environment creation steps)x

1. Created a Service MultiTenantRestore as shown Below.


2. Copy the databases backup on the new server where you want to restore as shown below.


3. For Restore all the Tenant and Application database from a Specified Location, i have used Below Powershell Command.
* Powershell should be Run as Administrator. How to Open Powershell.

--------------------------------------------------------------------------------------
# Powershell Command to Restore Backup of Tenant and Application Database.
# Author - Waldo
# Modified By - Saurav Dhyani
# Blog - saurav-nav.blogspot.com
# Parameters Need to Specify Before Running Command -
# Backups - Directory Path where backups have been placed with file extension *.bak. (Currently Set to D:\Tenants Backups\*.bak)
# fileloc - Directory Path for data file to get restored. (D:\Tenants\data)
# logloc -  Directory Path for log file to get restored. (D:\Tenants\log)

$Backups = dir 'D:\Tenants Backups\*.bak'
$fileloc = 'D:\Tenants\data'
$logloc  = 'D:\Tenants\log'

Set-NAVServerInstance MultiTenantRestore -stop

foreach ($BackupFile in $Backups) {
 'Restoring ' + $BackupFile.Directory + '\' + $BackupFile.Name

 $server = New-Object Microsoft.SqlServer.Management.Smo.Server localhost
 $backupDevice = New-Object Microsoft.SqlServer.Management.Smo.BackupDeviceItem $BackupFile, "File"
 $Restore = New-object Microsoft.SqlServer.Management.Smo.Restore

 #Set properties for Restore
 $Restore.NoRecovery = $false;
 $Restore.ReplaceDatabase = $true;
 $Restore.Devices.Add($backupDevice)
 $RestoreDetails = $Restore.ReadBackupHeader($server)
 $Restore.Database = Get-ChildItem $BackupFile | % {$_.BaseName}

 $dbname = Get-ChildItem $BackupFile | % {$_.BaseName}
 $files = $restore.ReadFileList($server)

 foreach ($file in $files)
 {
  $rsfile = new-object Microsoft.SqlServer.Management.Smo.RelocateFile
  $rsfile.LogicalFileName = $file.LogicalName
 

  $dbfile = $fileloc + '\'+ $dbname + '_Data.mdf'
  $logfile = $logloc + '\'+ $dbname + '_Log.ldf'

  if ($file.Type -eq 'D') {
    $rsfile.PhysicalFileName = $dbfile
  }
  else {
    $rsfile.PhysicalFileName = $logfile
  }
 $restore.RelocateFiles.Add($rsfile)
 }

 $Restore.SqlRestore($server)
}
--------------------------------------------------------------------------------------

You can download the Powershell command from the Sky Drive Link. Link is available at end of the Post.

4. Let's Understand the Command.
At the Beginning of the Command we set two Parameters i.e -

1. $Backups = dir 'D:\Tenants Backups\*.bak' (Directory Path where backups have been placed with file extension *.bak.)
2. $fileloc = 'D:\Tenants\data' (Directory Path for data file to get restored.)
3. $logloc  = 'D:\Tenants\log' (Directory Path for log file to get restored.)

Next i stopped the Service Instance which i will be using to mount my Application.

Then For Every .bak file in the Backup Directory,  i used the SQLPS Restore Commandlet to Restore the backup into the Server with certain properties set while restoring.
At the End i Placed the Data and Log file as per the parameter specified at the top of the commandlet.

5. When i executed the command, lets see what i get as output in Powershell.


6. Let's open SQL and check the database are they restored or not.


7. Now the task left is to set the service instance properties, let's do it from power shell.
--------------------------------------------------------------------------
# Powershell Command to Set service Instance to MultiTenancy.
# Author - Saurav Dhyani
# Blog - saurav-nav.blogspot.com
# Replace Server Name with Actual Server Name

Set-NAVServerConfiguration -ServerInstance MultiTenantRestore -KeyName MultiTenant -KeyValue "true"
Set-NAVServerConfiguration -ServerInstance MultiTenantRestore -KeyName DatabaseName -KeyValue ""
Set-NAVServerConfiguration MultiTenantRestore -Start

Mount-NAVApplication -DatabaseServer "<<SERVER NAME>>" -DatabaseName "MultiTenant_Application_Database" -ServerInstance MultiTenantRestore
Mount-NAVTenant -ServerInstance MultiTenantRestore -Id mytenant1 -DatabaseName "MyTenant1" -OverWriteTenantIDInDatabase
Mount-NAVTenant -ServerInstance MultiTenantRestore -Id mytenant2 -DatabaseName "MyTenant2" -OverWriteTenantIDInDatabase
Mount-NAVTenant -ServerInstance MultiTenantRestore -Id mytenant3 -DatabaseName "MyTenant3" -OverWriteTenantIDInDatabase
Mount-NAVTenant -ServerInstance MultiTenantRestore -Id mytenant4 -DatabaseName "MyTenant4" -OverWriteTenantIDInDatabase
Mount-NAVTenant -ServerInstance MultiTenantRestore -Id mytenant5 -DatabaseName "MyTenant5" -OverWriteTenantIDInDatabase

Set-NAVServerConfiguration MultiTenantRestore -Stop
Set-NAVServerConfiugration MultiTenantRestore -Start
-----------------------------------------------------------------------------
You can download the Powershell command from the Sky Drive Link. Link is available at end of the Post.


8. Let's try to understand what i am doing in above commandlet.

1. I Set the Service Instance as MultiTenant and remove the database Name from Service Instance. Then i start the service instance.
2. After that i mounted the application database on the service instance and after that mounted all tenats in the service instance.
3. After that i stop and started the service.

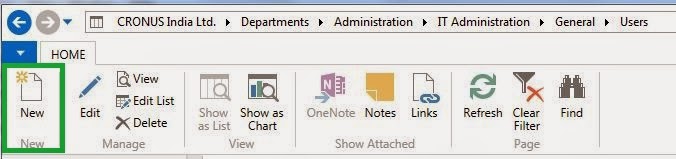
9. Let's navigate to administrative panel and check the service instance.


So i guess we have completed what we started successfully.

You can download the Powershell command from my SkyDrive.

File Name - Command 8 - NAV 2013 R2 - Restore a Multi Tenant Environment.
File Name - Command 9 - NAV 2013 R2 - Setting up Service Instance for Multi Tenant Environment.

Hope you find the information useful.

Regards,
Saurav Dhyani 
saurav-nav.blogspot.com

NAV 2013 - cumulative update 15 Released.

$
0
0
Hi all,

Please find below the details of Cumulative Update 15 released for Microsoft Dynamics NAV 2013.

Title - Update Rollup 15 for Microsoft Dynamics NAV 2013
Build No. - 36919
Release Date - June, 2014
Local Version Included - AU, AT, BE, CH, DE, DK, ES, FI, FR, IS, IT, NA, NL, NO, NZ, SE, UK

Download Link

For information about previous Update Rollup released for Microsoft Dynamics NAV 2013 below are the links -


Update Rollup 1 to 6                            Update Rollup 7                                        Update Rollup 8

Update Rollup 9                                  Update Rollup 10                                      Update Rollup 11

Update Rollup 12                               Cumulative Update 13     Cumulative Update 14

These links required valid Partner Source / Customer Source Login...

Regards,
Saurav Dhyani
saurav-nav.blogspot.com

NAV 2013 R2 - Cumulative update 8 Released.

$
0
0
Hi all,

Please find below the details of Update Rollup Cumulative Update 8 released for Microsoft Dynamics NAV 2013 R2.

Title - Cumulative Update 8 for Microsoft Dynamics NAV 2013 R2
Build No. - 36897
Release Date - June, 2014
Local Version Included - AU, AT, BE, CH, DE, DK, ES, FI, FR, IS, IT, NA, NL, NO, NZ, SE, UK, RU

Download Link

Note: Implementing this cumulative update will require a database conversion unless you have already implemented update rollup 5.


For information about previous Update Rollup released for Microsoft Dynamics NAV 2013 R2 below are the links -

   Update Rollup 1                             Update Rollup 2                                 Update Rollup 3                 

   Update Rollup 4                             Update Rollup 5                         Update Rollup 6

   Update Rollup 7

Regards,
Saurav Dhyani
saurav-nav.blogspot.com

NAV 2013 & NAV 2013 R2 - How to - Use OData to Return or Obtain a Service Metadata

$
0
0
Hi all,

In Previous post related to ODATA we saw how to publish and consume a ODATA Web Services from NAV 2013 & 2013 R2.

Below are some link Related to Old Articles Published for ODATA -

NAV RTC - Introduction to Web Services.

Introduction of ODATA Services In NAV 2013.

What is the ODATA?

Max. Page Size in ODATA Parameter.

Consuming Output of ODATA - Part 1


Today we will see a small but important point about ODATA i.e How we can see Metadata of Odata Web Service we have exposed.


The Example shown below is from NAV 2013 R2 and using a Page web Service. The Steps remain same for Query Web Services and in NAV 2013.


Create a Page Web Services for say Customer Card Page 21. 
*How to Create a Page Web Service.

For Checking the Metadata of the Exposed OData web Service, Open Internet Explorer and type in URL in below format -

http://<Server>:<WebServicePort>/<ServerInstance>/OData/$metadata

If standard installation and Server is running on Local Computer use -

http://localhost:7048/DynamicsNAV71/OData/$metadata

The keyword $metadata returns the Metadata of the exposed Odata Web Services in EDM Format as shown below.


If you see it there are some key points to Note -

Microsoft Dynamics NAV field names are mapped to EDMX property names by replacing spaces with underscores.

Primary key fields in tables are automatically defined as properties in the service metadata document even if they are not exposed on a page as controls.

I needed it and thought of sharing so that anyone else can use it, if required.

Regards,
Saurav Dhyani
saurav-nav.blogspot.com

NAV 2013 R2 - How to Backup and Restore Selected companies CONCEPT.

$
0
0
Hi all,

The most awaited feature in NAV 2013 R2 by most of the consultants around the globe have been finally come as a work around. All Thanks to Microsoft Product Team.

In this post we will see the various ways of taking the Backup of the Database available in NAV 2013 R2 and in subsequent posts we will see how to take backup using Powershell and Windows Client.

** The NAV 2013 R2 Should Have the Build 7.1.36987.
** Uninstall the Previous Version of NAV 2013 R2 and install the latest build.

Post in this series -

1. The Concept (This Post).

Without Tenants -
2.   Backup Using Direct Connection to Database.           
3.   Backup Using Service Tier.                                        
4.   Backup Using Windows Client.                                  
5.   Restore Using Direct Connection to Database.          
6.   Restore Using Service Tier.                                      
7.   Restore Using Windows Client.                                

With Tenants - 
8.   Backup Using Direct Connection to Database.
9.   Backup Using Service Tier.
10. Restore Using Direct Connection to Database.
11. Restore Using Service Tier.


THEORY - 

In earlier versions of Microsoft Dynamics NAV, we could move or copy all or part of the data in a database by using the Microsoft Dynamics NAV backup functionality.

In Microsoft Dynamics NAV 2013 R2, the support for the .fbk files was removed.

But With Cumulative Update 8 for Microsoft Dynamics NAV 2013 R2, Microsoft introduce Windows PowerShell cmdlets so you can export data from a Microsoft Dynamics NAV database and import it into another Microsoft Dynamics NAV database. We can also export and import data in the Microsoft Dynamics NAV Windows client and the Microsoft Dynamics NAV Web client.

The Way Around for .bak have been released.

IMPORTANT THINGS TO REMEMBER- 

When we export data to a .navdata file, we must import the data into a database that is compatible with the data in the .navdata file.

For example, we cannot import a company into a database that has a different database schema, and you cannot import Microsoft Dynamics NAV 2013 data into a Microsoft Dynamics NAV 2013 R2 database.

Also, you must import a company into a database that contains the data and application that the company's data depends on. This means that you must import a company into a database that is based on the same application as in the database that the company was exported from.

What to Export - 

We can export specific sets of data, such as a company or other data. Below are the details of what is exported depending on your choices.

Company => Exports the specified company or companies, or all companies in the database. This includes the company-specific business data but no other data.

Global data => Exports data that is common to all companies in the database. This includes the report list, user IDs, and printer selections, but no company-specific business data.

Application data => Exports the data that defines the application in the database. This includes the permissions, permission sets, profiles, and style sheets.

Application Exports => all application objects. Data is not included. This is similar to exporting all objects to an .fob file.


What to Import - 

We can import all data from a .navdata file, or you can choose the data that you want to import.

For example, if the file contains four companies, you can choose to import only one company. Similarly, if the file contains all data, you can choose to import only global data, for example. To import applications, you must use the Import-NAVData Windows PowerShell cmdlet.

You can import other data, such as companies, in the Microsoft Dynamics NAV Windows client and the Microsoft Dynamics NAV Web client. You can export and import the four types of data in different combinations. However, you must maintain database integrity and not leave databases in a state when you cannot open Microsoft Dynamics NAV.

Windows PowerShell Cmdlets - 

You can import and export companies and data in the Microsoft Dynamics NAV 2013 R2 Administration Shell. The cmdlets take different parameter sets depending on how you connect to the database that you want to export data from or import data into. You can access the database through the Microsoft Dynamics NAV Server instance, or you can access the database directly as described in the following table.

Access => Through the Microsoft Dynamics NAV Server instance =>

Use Parameter sets that include –ServerInstance when the database that you want to access is mounted against a Microsoft Dynamics NAV Server instance. The user account for the Microsoft Dynamics NAV Server instance must have access to write to the location that is specified by the –FileName parameter.

Access => Through a direct connection to the database =>

Use parameter sets that include –DatabaseServer and –DatabaseName when the Microsoft Dynamics NAV Server instance is stopped or not available. For example, if you want to import an updated application into a database, you stop the service so that users cannot access the database. You must have access to write to the location that is specified by the –FileName parameter.

In multitenant deployments of Microsoft Dynamics NAV, if you export or import business data, you must specify the ID of the tenant database. If you export or import applications, you must specify the application database and database server. You can only import application data if the specified tenant is mounted with the –AllowAppDatabaseWrite parameter.

C/AL Functions You can use the following C/AL functions to handle export and import of data programmatically:

EXPORTDATA Function (Database) 
IMPORTDATA Function (Database) 
DATAFILEINFORMATION Function (Database) 

We start tomorrow morning with database backup using direct connection to database and will continue the series in multiple posts to make it easy to understand.

Stay tuned for more.

Regards,
Saurav Dhyani
saurav-nav.blogspot.com

NAV 2013 R2 - How to Backup Selected companies - Powershell (Using SQL Database).

$
0
0
Hi all,

As discussed in earlier post, we will see how to take navision backup similar to .fbk file and restore it in a new database. In this post we will list down the steps to take backup using power-shell.

If you haven't read the Previous post, please refer here.

Hope till now you have uninstalled the older build of NAV 2013 R2 and installed the latest Build i.e 7.1.3687 as shown below.


For Demo Purpose i have a created 4 companies in a database as shown below, where A & B are copy of Cronus international whereas C is a blank company.


1. Open Powershell ISE as administrator and Load Powershell Commandlet for Microsoft Dynamics NAV by copying and pasting below command in Window.
How to open and Load NAV Commandlets?

-----------------------------------------------------------------------------------
#Prepare PowerShell
Import-Module 'C:\Program Files\Microsoft Dynamics NAV\71\Service\NavAdminTool.ps1'
-----------------------------------------------------------------------------------

2.Search for Export-NAVData Commandlet in Command Addon. If Command Addon is not visible, enable it from View Menu.


3. If you see there are multiple options in Export-NAVData as listed below -

1. UseDatabase_AllCompanies
2. UseDatabase_SomeCompanies
3. UseNST_AllCompanies
4. UseNST_SomeCompanies

1 & 2 can be used either the server instance is stopped or not available. [Direct Database]
3 & 4 will only be used if the server instance is running. [Navision Service Tier]

Let's see how to use each of them.

1. UseDatabase_AllCompanies

* This is similar to SQL Backup i would say but will lot of options. Let's explore -

Below are parameters of the command-lets 1 -

1.  All Companies - You want to backup all companies or not, NEED TO SET TRUE.
2.  Database Name - The Database name from which you want to backup.
3.  File Name - The File Path and name where you want to store the backup (ends with Extension => .navdata).
4.  ApplicationDatabaseName - Used in Multitenat (Will Discuss Later in separate post)
5.  ApplicationDatabaseServer - Used in Multitenat (Will Discuss Later in separate post)
6.  Database Server - Server Name where the database is placed.
7.  Description - Description to file that you want to give.
8.  Include Application - Want application objects or not.
9.  Include Application Data - Want  data that defines the application in the database.
10. Include Global Data - Want Data conman to all companies or not.

As shown below is the parameters set for the backup.


Below is the command generated for the all comapnies backup.
-------------------------------------------------------------------------
Export-NAVData -AllCompanies -DatabaseName "Demo Database NAV (7-1)" -FileName C:\All_Comapniesbackup.navdata -DatabaseServer Servername -Description "This is a sample backup of all the companies." -IncludeApplication -IncludeApplicationData -IncludeGlobalData
-------------------------------------------------------------------------
Run the command and backup will be placed as shown below.


2. UseDatabase_SomeCompanies

Below are parameters of the commandlets 2 -

1.  Database Name - The Database name from which you want to backup.
2.  File Name - The File Path and name where you want to store the backup (ends with Extension => .navdata).
3.  ApplicationDatabaseName - Used in Multitenat (Will Discuss Later in separate post)
4.  ApplicationDatabaseServer - Used in Multitenat (Will Discuss Later in separate post)
5.  CompanyName - Name of Company you want to backup (if multiple put them as comma separated).
    * Multi Character Name should be in ''.
6.  Database Server - Server Name where the database is placed.
7.  Description - Description to file that you want to give.
8.  Include Application - Want application objects or not.
9.  Include Application Data - Want  data that defines the application in the database.
10. Include Global Data - Want Data conman to all companies or not.

As shown below is the parameters set for the backup.


Below is the command generated for the all comapnies backup.
-------------------------------------------------------------------------
Export-NAVData -DatabaseName "Demo Database NAV (7-1)" -FileName c:\TwoCompany.navdata -CompanyName A,C -DatabaseServer INDEL-SXD6995NB -Description "This is a sample backup of selected companies." -IncludeApplication -IncludeApplicationData -IncludeGlobalData
-------------------------------------------------------------------------
Run the command and backup will be placed as shown below.


In the Next post we will see the backup steps that can be taken with another two option in NAVEXPORT Commandlet i.e Service Related.

Hope you find the information useful.

Stay tuned for more.

Regards,
Saurav Dhyani

NAV 2013 R2 - How to Backup Selected companies - Powershell (Using Service Tier).

$
0
0
Hi all,

In this post we will list down the steps to take backup using power shell & Service Instance.

If you haven't read the Previous post, please refer to Index of Posts.

We will see usage of below listed 3 & 4 Commandlet options in this post.

3. UseNST_AllCompanies
4. UseNST_SomeCompanies

Let's see how to use each of them.


3. UseNST_AllCompanies

* Remember the Service Instance Should be Running and Available.

Below are parameters of the command-lets 3 -

1.  All Companies - You want to backup all companies or not.
2.  File Name - The File Path and name where you want to store the backup (ends with Extension => .navdata).
3.  ServerInstance - Service Name which is connected to Database which we want to backup.
4.  Description - Description to file that you want to give.
5.  Include Application - Want application objects or not.
6.  Include Application Data - Want  data that defines the application in the database.
7.  Include Global Data - Want Data common to all companies or not.
8.  Tenant - Used in Multitenat (Will Discuss Later in Separate Post)

As shown below is the parameters set for the backup.


Below is the command generated for the all companies backup.
-------------------------------------------------------------------------
Export-NAVData -AllCompanies -FileName c:\All_Comapniesbackup_Service.navdata -ServerInstance DynamicsNAV71 -Description "This is all companies backup using service tier." -IncludeApplication -IncludeApplicationData -IncludeGlobalData
-------------------------------------------------------------------------
Run the command and backup will be placed as shown below.


4. UseNST_SomeCompanies

* Remember the Service Instance Should be Running and Available.
* In this script we skip the application objects and global data.

Below are parameters of the command-lets 4 -

1.  File Name - The File Path and name where you want to store the backup (ends with Extension => .navdata).
2.  ServerInstance - Service Name which is connected to Database which we want to backup.
3.  CompanyName - Name of Company you want to backup (if multiple put them as comma separated).
    * Multi Character Name should be in ''. 
4.  Description - Description to file that you want to give.
5.  Include Application - Want application objects or not.
6.  Include Application Data - Want  data that defines the application in the database.
7.  Include Global Data - Want Data common to all companies or not.
8.  Tenant - Used in Multitenat (Will Discuss Later in Separate Post)

As shown below is the parameters set for the backup.


Below is the command generated for the all companies backup.
-------------------------------------------------------------------------
Export-NAVData -FileName c:\Two_Comapniesbackup_Service.navdata -ServerInstance DynamicsNAV71 -CompanyName B,'CRONUS International Ltd.' -Description "This is two companies backup using service tier without Global data." -IncludeApplicationData
-------------------------------------------------------------------------
Run the command and backup will be placed as shown below.


I hope you are able to understand the concept discussed above. In Next post we will see how to Take Backup from Windows Client.

Regards,
Saurav Dhyani

NAV 2013 R2 - How to Backup Selected companies - Windows / Web Client.

$
0
0
Hi all,

In this post we will list down the steps to take backup using Windows Client.
* Steps Remain Same for Web Client.

If you haven't read the Previous post, please refer to Index of Posts.

Pre-Requisites -

To export or import data from a Microsoft Dynamics NAV database, you must be a user in the Microsoft Dynamics NAV database, and your user account must have a permission set that enables you to export or import data, such as the SUPER permission set.


Microsoft recommend that you define a specific permission set such as DATA-EXPORTIMPORT and add System permissions 5410, Export Data to Data File, and 5420, Import Data from Data File. Optionally, add other permissions, and then assign the permission sets to the users that you want to be able to export and import data.

For Exporting Data From Client (Windows / Web) Navigate To - 


Departments/Administration/IT Administration/General.


Under Task you will find Import Data From File & Export Data To File as shown.


Select Export Data To File and fill in the details as discussed in Previous Post and Click OK.


The Backup has been Completed successfully.


Objects - Below is the List of Pages Introduced For Backup and Restore =>

Page 9900 => Import Data Enables users to import data from a Microsoft Dynamics NAV data file.
Page 9901 => Export Data Enables users to export data to a Microsoft Dynamics NAV data file.

Permissions - Below is the Permission Required to Execute Above Pages =>

System 5410 => Export Data to Data File Enables users to export data to a Microsoft Dynamics NAV data file.
System 5420 => Import Data from Data File Enables users to import data from a Microsoft Dynamics NAV data file.

I hope you are able to understand the concept discussed above. In Next post we will restore these backups.

Regards,
Saurav Dhyani
saurav-nav.blogspot.com

NAV 2013 R2 - How to Restore Selected companies - Powershell (Using SQL Database).

$
0
0
Hi all,

As discussed in earlier post, we will see how to take Restore backup in a new database. In this post we will list down the steps to restore the backup taken using Powershell.

If you haven't read the Previous post, please refer Index Post here.

From the Task Performed in Earlier Posts Backup From Powershell, i have below files as shown Below -


What if i have received a file from someone else and i Don't know what exactly the each file Contain?

Microsoft have provided a Commandlet for the same i.e Get-NAVDataFile.

This Commandlet takes file Location and Name as parameter and returns the details of Content of the backup File.

Open Powershell and Let's check the two file content using Get-NAVDataFile =

--------------------------------------------------------------
Get-NAVDataFile -FileName "c:\All_Comapniesbackup.navdata"
---------------------------------------------------------------


So its clear from the Result of Commandlet that the above file contain 4 Companies with IncludeApplication, IncludeApplicationData & IncludeGlobalData.

Let's try to Restore the backups.

1.Search for Import-NAVData Commandlet in Command Addin.

2. If you see there are multiple options in Import-NAVData as listed below (For Database Options)-

1. UseDatabase_AllCompanies
2. UseDatabase_SomeCompanies

1 & 2 can be used even if the server instance is stopped or not available.

Out of these we will not demonstrate UseDatabase_AllCompanies, because it like SQL Restore.

In this post we will see UseDatabase_SomeCompanies.

Let's see how to use each of them.

For Demo i have Restored the Demo Database Backup with Name Restore_Demo_2013R2 with Single Company Test as shown below.


1. UseDatabase_SomeCompanies
I am using the Backup taken From Direct Database Connection as per earlier Post.
File Name - All_Comapniesbackup.navdata

Below are parameters of the command-lets 1 -

1.  Database Name - The Database name in which you want to Restore.
2.  File Name - The File Path and name where backup is placed (ends with Extension => .navdata).
3.  ApplicationDatabaseName - Used in Multitenat (Discuss Later in separate post)
4.  ApplicationDatabaseServer - Used in Multitenat (Discuss Later in separate post)
5.  Company Name - Name of the Company You want to Restore from Backup.
    * IF Company Name contain multiple Words put it in ''.
6.  Database Server - Server Name where the database is placed.
7.  Include Application - Want application objects or not.
8.  Include Application Data - Want  data that defines the application in the database.
9.  Include Global Data - Want Data common to all companies or not.

As shown below is the parameters set for the backup.


Below is the command generated for the two selected companies restore.

-------------------------------------------------------------------------
Import-NAVData -DatabaseName Restore_Demo_2013R2 -FileName c:\All_Comapniesbackup.navdata -CompanyName A,B -DatabaseServer INDEL-SXD6995NB -Force
-------------------------------------------------------------------------
** As i only need data specific to Company A & B, i will not select IncludeApplication, IncludeApplicationData & IncludeGlobalData.

Run the command and backup will be restored in the database.


In the Next post we will see the how to restore backup taken from Service Tier.
Hope you find the information useful.

Stay tuned for more.

Regards,
Saurav Dhyani
saurav-nav.blogspot.com

NAV 2013 R2 - How to Restore Selected companies - Powershell (Using Service Tier)

$
0
0
Hi all,

As discussed in earlier post, we will see how to take Restore backup in a new database. In this post we will list down the steps to restore the backup taken using powershell service commandlet.

If you haven't read the Previous post, please refer Index Post here.

Let's check the Content of Backup Taken Via Emport-NavData.

Microsoft have provided a Commandlet for the same i.e  Get-NAVDataFile.
This Commandlet takes file Location and Name as parameter and returns the details of Content of the backup File.

Open Powershell and Let's check the two file content using Get-NAVDataFile =
--------------------------------------------------------------
Get-NAVDataFile -FileName "c:\Two_Comapniesbackup_Service.navdata"
---------------------------------------------------------------


So its clear from the Result of Commandlet that the above file contain 2 Companies with IncludeApplicationData only.


Let's try to Restore the backups.

1.Search for Import-NAVData Commandlet in Command Add-in.

2. If you see there are multiple options in Import-NAVData as listed below (same as Export-NAVData)-

1. UseNST_AllCompanies
2. UseNST_SomeCompanies

1 & 2 can only be used if the server instance is running.

Out of these we will not demonstrate UseNST_AllCompanies, because it like SQL Restore.

In this post we will see UseNST_SomeCompanies.

1. UseNST_SomeCompanies

I am using the Backup taken From Direct Database Connection as per earlier Post.
File Name - Two_Comapniesbackup_Service.navdata

Below are parameters of the command-lets 1 -

1.  FileName - The File Path and name where backup is placed (ends with Extension => .navdata).
2.  ServerInstance - Name of Service on Which database is connected in which you want to restore.
3.  CompanyName - Name of the Company You want to Restore from Backup.
    * IF Company Name contain multiple Words put it in ''.
4.  IncludeApplicationData - Want  data that defines the application in the database.
5.  Include Global Data - Want Data common to all companies or not.
6.  Tenant - Used in MultiTenants (Discuss Later in separate post)

As shown below is the parameters set for the backup.


Below is the command generated for the all companies backup. (Company Names is Case Sensitive)

-------------------------------------------------------------------------
Import-NAVData -FileName c:\Two_Comapniesbackup_Service.navdata -ServerInstance RestoreDemo -CompanyName 'CRONUS International Ltd.' -Force
-------------------------------------------------------------------------
** As i only need data specific to Company 'CRONUS International Ltd.', i will not select IncludeApplication, IncludeApplicationData & IncludeGlobalData.

Run the command and backup will be restored in the database.


In the Next post we will see the restore steps that can be restored with Windows/Web Client.

Hope you find the information useful.

Stay tuned for more.

Regards,
Saurav Dhyani

NAV 2013 R2 - How to Restore a Selected companies - Windows/Web Client.

$
0
0
Hi all,

In this post we will list down the steps to Restore backup using Windows Client.
* Steps Remain Same for Web Client.

If you haven't read the Previous post, please refer to Index of Posts.

Pre-Requisites -

To export or import data from a Microsoft Dynamics NAV database, you must be a user in the Microsoft Dynamics NAV database, and your user account must have a permission set that enables you to export or import data, such as the SUPER permission set.


Microsoft recommend that you define a specific permission set such as DATA-EXPORTIMPORT and add System permissions 5410, Export Data to Data File, and 5420, Import Data from Data File. Optionally, add other permissions, and then assign the permission sets to the users that you want to be able to export and import data.

For Importing Data From Client (Windows / Web) Navigate to - 

Departments/Administration/IT Administration/General.

Under Task you will find Import Data From File & Export Data To File as shown below.


Select Import Data To File and fill in the details as discussed in Previous Post and Click OK. The Restoration has been Completed succesfully.


Objects - Below is the List of Pages Introduced For Backup and Restore =>

Page 9900 => Import Data Enables users to import data from a Microsoft Dynamics NAV data file.
Page 9901 => Export Data Enables users to export data to a Microsoft Dynamics NAV data file.

Permissions - Below is the Permission Required to Execute Above Pages =>

System 5410 => Export Data to Data File Enables users to export data to a Microsoft Dynamics NAV data file.
System 5420 => Import Data from Data File Enables users to import data from a Microsoft Dynamics NAV data file.

I hope you are able to understand the concept discussed above. In Next post we will See the Usage of Commandlet in Multitenant Environment.

Regards,
Saurav Dhyani
saurav-nav.blogspot.com
Viewing all 1143 articles
Browse latest View live